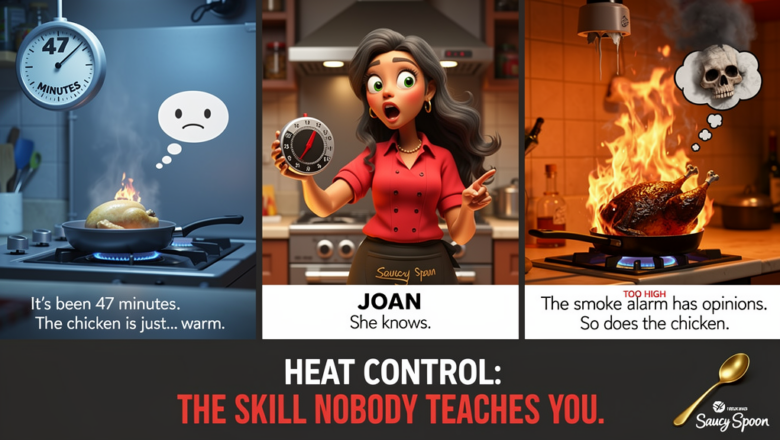
Every single cooking failure you have ever had — the burnt garlic, the rubbery chicken, the scrambled eggs that turned into yellow rubber — had the same root cause. It was not the recipe. It was not the pan. It was not your skills. It was the heat. Wrong temperature, wrong timing, wrong understanding of what heat actually does to food. Fix your relationship with heat and you fix your cooking. All of it. At once.
This is the skill that professional kitchens teach on day one and home cooking resources skip entirely. Knowing how to control heat cooking is not a bonus skill. It is the foundation that every other technique sits on. And I am going to teach it to you right now.
The Joan Rant on Heat Control
Here is what recipe books do. They say “cook over medium heat” and move on like that sentence contains useful information. Medium heat on a 1970s gas stove in a thin aluminium pan is completely different from medium heat on a modern induction hob in a cast iron skillet. The knob position tells you nothing. The number on the dial tells you nothing. “Medium” is not a temperature. It is a suggestion. A vague, irresponsible, wildly variable suggestion that gets blamed on the cook when things go wrong — when the actual problem was that nobody ever explained what heat is actually doing to the food and how to read whether you have the right amount of it.
The myth here is that cooking temperature is something you set and forget. You choose a dial position, you walk away, the food cooks. That is not cooking. That is hoping. Real heat control is an active, responsive, ongoing conversation between you and the pan. You are reading what is happening — the colour of the oil, the sound of the sizzle, the behaviour of the food — and adjusting constantly. It is not complicated once you know what to look for. But nobody shows you what to look for, so you stand there guessing and then blame yourself when things go wrong. You were not failing at cooking. You were cooking without information. That ends today.
What Is Actually Happening Here
Heat does one thing to food: it causes chemical and physical reactions that change the food’s texture, flavour, and appearance. The rate at which those reactions happen determines whether the result is what you wanted.
The two most important reactions to understand are the Maillard reaction and protein coagulation. The Maillard reaction is the browning reaction — it happens when proteins and sugars are exposed to dry heat above approximately 140C (284F). This is what creates the brown crust on a seared steak, the golden colour on roasted vegetables, the caramelised exterior of a griddled piece of bread. It requires dry heat above 140C. Below 140C, you get steaming and softening but no browning. Above 200C (392F), browning becomes burning. The Maillard sweet spot for most applications is 160 to 190C (320 to 374F) at the food’s surface.
Protein coagulation is what happens when egg, meat, and fish proteins are exposed to heat and set. Egg whites begin setting at 60C (140F). Yolks begin setting at 65C (149F). Chicken breast proteins tighten significantly above 72C (162F) and become dry and tough above 80C (176F). Fish proteins are fully cooked at 63C (145F) and rubbery if taken much higher. These numbers explain everything that has ever gone wrong with your eggs or your chicken. Too much heat too fast drives proteins past the point of tender and into the territory of tough, dry, and unpleasant.
The third thing to understand is thermal lag. When you change the temperature on your dial, the pan does not respond immediately. Cast iron takes two to three minutes to fully adjust after a dial change. Stainless steel is faster — 60 to 90 seconds. Non-stick is fastest but also most temperature-sensitive (never heat an empty non-stick pan on high — the coating degrades above 260C/500F). This lag means you need to anticipate changes rather than react to them. Lower the heat before things look like they need it. The pan will catch up.
Different materials also hold and distribute heat completely differently. Cast iron holds heat intensely and distributes it evenly — excellent for searing because it does not lose temperature when cold food hits it. Stainless steel heats quickly and responds faster to dial changes — better for sauces and anything requiring precise temperature responsiveness. Copper is the most responsive of all and is why professional pastry kitchens use it for sugar work. Thin aluminium heats fast but creates hot spots and loses temperature quickly. Know your pan and you know half of how to control heat cooking before you even turn on the burner.
The Joan Method: Heat Control Done Right
What You Will Need:
- Your primary pan (whatever you cook in most often — start there)
- A neutral oil with a medium-high smoke point (vegetable, sunflower, or light olive oil — not extra virgin for high heat)
- A piece of bread for the temperature test
- An instant-read thermometer (optional but genuinely transformative — a good one costs under $15 and will improve your cooking more than any other single purchase)
- Something to cook — start with a chicken thigh or two eggs, both of which reveal heat errors immediately and clearly
Step 1: Learn your stove’s actual heat levels through a water test.
Before you cook anything, put a tablespoon of water in your pan on each setting from 1 to 10 and observe. On setting 1 or 2, water should evaporate slowly over several minutes. On setting 5, water should evaporate in about 30 seconds. On setting 8 or 9, water should evaporate almost instantly with aggressive sputtering. On setting 10 maximum, the pan should be hot enough to vaporise water on contact. Write these down. Your stove’s numbers now mean something specific. They are no longer abstract.
Step 2: Always preheat the pan before adding oil.
Put the empty pan on the heat first. Let it warm for 60 to 90 seconds on medium-low. Then add your oil. Why? Because a warm pan distributes heat evenly before the oil goes in, which means the oil heats evenly. Cold oil in a cold pan creates uneven heat pockets and the first food you add cooks unevenly because it hits different temperatures across the same surface.
Step 3: Use the oil to read the pan temperature before food goes in.
After adding oil to the warm pan, watch it. At 130C (266F), the oil will start to shimmer slightly — it moves more freely when you tilt the pan and has a slightly oily sheen. At 160C (320F), you will see small ripples appearing on the surface — this is the temperature for most sautéeing and pan-frying. At 190C (374F), the oil will begin to smoke lightly — this is high-heat searing territory. If smoke appears before you add food, you are at the upper limit. At this temperature, add food immediately or reduce the heat. Oil that sits and smokes for more than 30 seconds is degrading and developing off-flavours.
Step 4: Joan’s Kitchen Test — the bread cube method.
Drop a 2cm cube of white bread into your oiled pan. At 160C (320F), it should turn golden in exactly 60 seconds. At 180C (356F), it should turn golden in 40 seconds. At 190C (374F), it should turn golden in 20 seconds. This test gives you a calibrated reading of your actual oil temperature without a thermometer. Do this before frying or searing anything until you have learned your stove well enough to read by sight and sound alone.
Step 5: Listen to the food when it hits the pan.
The sound of food entering a pan tells you immediately whether you have the right heat. A confident, sustained sizzle — like a medium rain shower — means correct temperature for most cooking. A timid, barely audible whisper means the pan is too cold and your food will stew rather than sear. An explosive crackle and aggressive spitting means the pan is too hot and the exterior will burn before the interior cooks. Adjust before you commit to the cook. Move the food to a cooler part of the pan, reduce the heat, or — if necessary — remove the food, let the pan cool for 30 seconds, and start again.
Step 6: Adjust heat proactively, not reactively.
The most common error in heat management is waiting until something looks wrong before changing the temperature. By the time garlic looks brown, it has already burned — the heat in the pan is ahead of what you are seeing by five to ten seconds. Reduce heat before you think you need to. Particularly: reduce when you add a new ingredient to a hot pan, as most ingredients release moisture on contact which drops the pan temperature temporarily before recovering — if your heat is too high, this recovery phase burns the food. Reduce when a protein starts to look set on the edges — the interior is still cooking from residual heat and needs the external temperature to drop.
Step 7: Rest and carry-over cooking are part of heat control.
Heat does not stop when you turn off the burner or remove food from the pan. A chicken thigh pulled from the pan at an internal temperature of 68C (154F) will carry-over cook to 74C (165F) — the safe serving temperature — during a five-minute rest. A steak pulled at 52C (126F) reaches medium-rare at 54C (129F) during a three-minute rest. Build carry-over into your cooking. Pull things earlier than you think. Cover loosely with foil and let the residual heat finish the job. Your food will be juicier, more evenly cooked, and more consistently correct every single time.
Joan’s Pro Tip
Get an instant-read thermometer and use it for everything for the next two weeks. Not just meat — eggs, oil, water for bread, the pan surface if your thermometer reads surface temperature. Two weeks of seeing actual numbers will permanently calibrate your intuition. After two weeks, put the thermometer away and cook by feel. You will find your feel is now accurate because it was trained against real data rather than guesswork. This is how professional cooks learn. They use the thermometer until they do not need it. You should do the same.
The Three Mistakes That Kill This Every Time
- Cooking everything on high heat because higher seems faster. High heat does cook food faster at the surface. It also burns the outside before the inside is done, drives protein-rich foods into toughness, and destroys delicate flavours. The actual fastest way to cook most food is the correct heat — not the highest heat. An onion softened on medium-low for eight minutes is ready eight minutes later. The same onion on high heat is burnt on the outside and raw in the middle three minutes later and needs to be thrown out. High heat is a tool for specific applications — searing, stir-frying, boiling water. It is not a default.
- Not adjusting when the food tells you to. The food speaks constantly. Excessive smoking, aggressive colour development, a sound that shifts from sizzle to silence — these are instructions. A sizzle going quiet means the food has released its moisture and is now steaming and going soft. Increase the heat or remove the food. Colour developing too fast means reduce immediately. Most home cooks observe these signals and continue anyway because they do not want to deviate from the recipe’s dial setting. The recipe’s dial setting is written for an average stove that is not your stove. Trust the food, not the number.
- Opening a cold pan with high heat and no warm-up period. The thermal shock of maximum heat applied to a cold pan creates immediate hot spots at the heat source and cold zones everywhere else. Your food hits both simultaneously and cooks unevenly. Always warm the pan gradually — start at medium for 60 to 90 seconds before increasing to your cooking temperature. The extra minute of warm-up is recovered in cooking precision every single time. Cold pan, high heat, no warm-up is the recipe for sticking, burning, and uneven results in that specific sequence.
The Closer
I learned heat control the hard way. I burned garlic approximately four hundred times in my first year of cooking before I understood that garlic goes from perfect to destroyed in about fifteen seconds at the wrong heat and that lowering the dial when garlic goes into the pan is not optional — it is mandatory.
The moment I understood that heat is not a setting but a conversation — that I am supposed to be reading and responding rather than setting and walking away — everything changed. Food stopped burning. Proteins stopped toughening. Eggs stopped weeping. Chicken stopped drying out. Not because I got better ingredients or better pans. Because I finally understood what was happening in the pan and started responding to it.
You have everything you need to do this right now. Your stove, your primary pan, a tablespoon of oil, and the water test from Step 1. Go run that test tonight before you cook dinner. Learn what your dial settings actually mean on your specific stove. That knowledge is worth more than any recipe I could give you.
The heat is the whole game. Now you know how to play it. Let’s get saucy.